Counter
Followers
PingBox
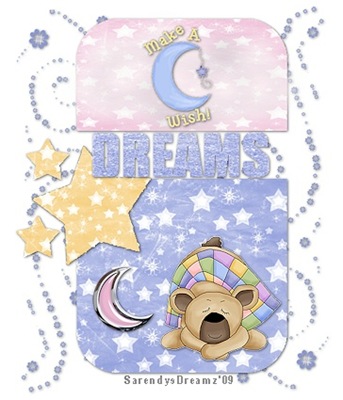
Sweet Dreams
This tutorial was written by me June '09. It is ©SarendysDreamz
Any similarity to other tutorials is coincidental.
Do not copy this tutorial post through any groups or claim as your own.
Supplies Needed
Scrap Kit I Used Is called 'Sweet Dreams' by I Don't Give A Scrap. You Can Buy The Kit Here
Template Of Choice - I Used 'Missy Tag Template 108' Which Can Be Downloaded Here
1. Open Up Template.
2. Open Up Paper of Choice - I Used SDPaper7
Image - resize 75%
Edit - Copy
3. Make The Template Active
Click on Your Magic Wand
(Feather and tolerance - 0)
4. Making Sure The Shape One Layer is Active Select the Middle of the Shape.
Edit - Paste as New Layer
Selections – Invert
Hit Delete on Your Keyboard
Selections – Select None
5. Redo Steps 2 - 4 for the other shape and the 3 stars
Using Different Papers For Each (resize 75%)
I used: Shape 2 - SDPaper9
Stars - SDpaper6
WordArt - SDGlitterpaper4
6. Open SDCloud
Image - resize 50% twice
Copy - Paste onto Template
Move into Desired Place
Lower Opacity to 70%
7. Open SDMobile - Resize 25% then 50%
Copy - Paste onto Template
Image - Rotate - Free Rotate 10 Left
8. Open SDBear - Resize 25%
Copy - Paste onto Template
Move to Desired Place
9. Open SDmoongems - Resize 25% then 50%
Copy - Paste onto Template
Image - Mirror
Move into Desired Place
10. Open SDFlowerDust - Resize to 550px on the Longest Side
Copy - Paste onto Template
Move Layer so its Above The White Background Layer
Layers - Duplicate
Go Back to Original Layer
Image - Mirror
Image Flip
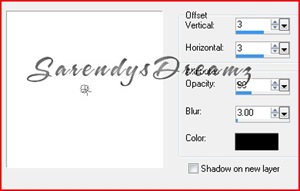
11. Add Drop Shadow of choice to
All Layers APART From the Cloud.
(I used 1, 1, 60, 6)
12. Merge Layers
Resize to Around 425px on the Longest Side
13. Add Watermark and save as JPG
I hope You Have Enjoyed This Tutorial
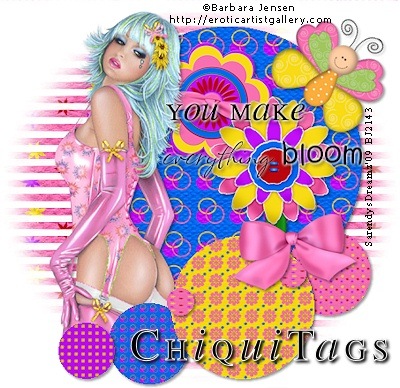
Bloom Tag Offer
I tag in a wonderful group called ChiquiTags. If you would like the above tag and request tags from other awesome taggers click here
Lil Star
This tutorial was written by me June '09. It is ©SarendysDreamz
Any similarity to other tutorials is coincidental.
Do not copy this tutorial post through any groups or claim as your own.
Supplies Needed
Scrap Kit I Used Called ‘Baby Time’ by Charly of Country Hollow Creations. You Can Downloaded The Kit Here
Mask Of Choice – I used JulesMsk4 Created by Jules Junk. You Can Download The Mask Here
1. Open New Transparent Image, 550 x 550
2. Open BabyMat (Image 156)
Copy - Paste As New Layer onto Working Image
3. Image - Resize 85% (all layers UNchecked)
Effects - 3D Effects - Drop Shadow
2, 2, 30, 3
Add Drop Shadow again but this time -2, -2. 30, 3
4. Open Bow of Choice (I Used Image 33)
Copy - Paste As New Layer Onto Working Image
Image - Resize 75%
(all layers UNchecked)
5.Move to the Top Right
(See my Example)
Effects - 3D Effects - Drop Shadow
2, 2, 30, 3
6. Open Flower of Choice
(I Used Image38)
Copy - Pasted As New Layer onto Working Image
Image - Resize 75%
7. Move to the Bottom Left
(See My Example)
Effects - 3D Effects - Drop Shadow
2, 2, 30, 3
8. Open Bunch of Flowers (Image31)
Copy and Paste As New layer onto Working Image
Lower Opacity to 50
(I Rotated My Flowers 10 Degrees to the Right)
9. Open CHS-BabyGirl-Malakye
Image - Resize 50%
Copy and Paste As New Layer onto Working Image
10.Move to Bottom Left
(See My Example)
Move this Layer Below Flower Layer
Effects - 3D Effects - Drop Shadow
2, 2, 30, 3
11. Make Your Bottom layer Active
Layers - New Raster Layer
12. Open Paper of Choice (I used CHS-Paper4)
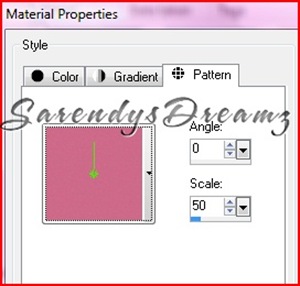
Open Your Materials Palette and Select Pattern
Find You Paper in the Drop Down
And Set as Follows
13. Open Mask of Choice
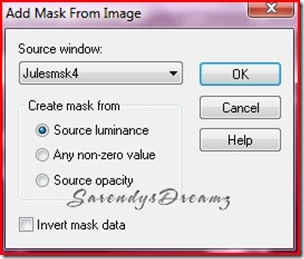
Layers - New Mask Layer - From Image
Find Your Mask In the Drop Down Menu
Layers - Merge - Merge Group
**I Duplicated My Mask Layer Because The Color Was Light**
14. Repeat Steps 12 and 13 Using A Different Paper Color
15. Image - Free Rotate
Rotate Your Mask Layer To Your Own Liking
16. Add Any Text You Would Like
17. Add Your Watermark and Any Copyrights
18. Layers - Merge - Merge Visible
19. Save as JPG
I Hope you have enjoyed my tutorial :)
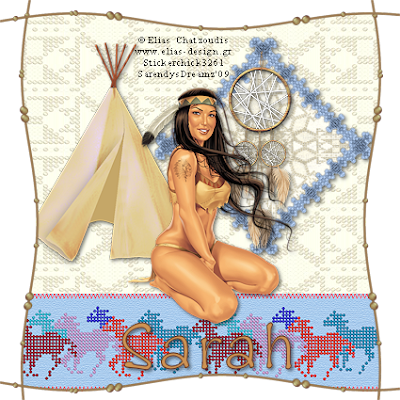
NA Knotted Frame
This tutorial was written by me June '09. It is ©SarendysDreamz
Any similarity to other tutorials is coincidental.
Do not copy this tutorial post through any groups or claim as your own.Supplies Needed
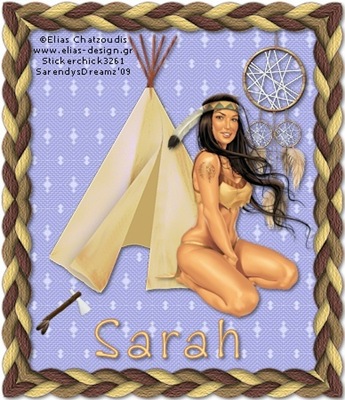
Tube of choice - I am using the art of Elias Chatzoudis which you can purchase here
Scrap Kit I used is called 'The Trading Post' by Jules Junk and can be purchased here
Font of Choice - I used Zipty Do
1. Open Frame of Choice, I used TTP-Frame3
2. Image - Resize to 450px on the longest side.
(Resize all layers CHECKED)
3. Activate your magic wand
(Tolerance and Feather set to 0)
4. Click in the Center of the Frame.
5. Selections - Modify - Expand 5px
6. Open Paper of Choice, I used TTP-Paper6
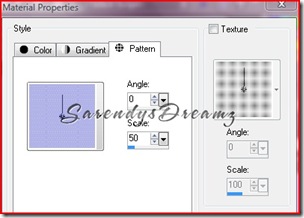
7. Click on your material palette and go to Pattern
Select the paper you just opened from the drop down menu
Use these settings Angle 0, Scale 50
8. Layers - New Raster Layer
Layers - Arrange - Move to Bottom
9. Flood Fill with pattern
Selections - Select None
10. Open TTP-Teepee
Resize as necessary, (I resized 50% then 75%)
Make sure resize all layers is UNchecked
11. Copy Teepee and Paste onto Your Image
Move the Teepee to Where You Want It
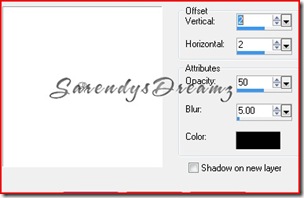
11. Effects - Drop Shadow
12. Open TTP-DreamCatcher
Image - Resize (I resized 50% x2 and then 75%)
13. Copy and Paste onto Your Image
Move the DreamCatcher Until its in a Position You Like.
Effects - Drop Shadow (as Above)
14. Open Tube of Choice
Resize if Needed
15. Copy Tube and Paste onto Your Image
Add Same Drop Shadow As Above
16. Add Any Other Elements, Resize As Necessary
Add Drop Shadow
17. Layers - Merge Visible
Adjust - Sharpness - Sharpen
18. Add Watermarks/Copyrights
19. Save as Jpg
Hope you have enjoyed my tutorial
Nag Nag Tut
Any similarity to other tutorials is coincidental.
Do not copy this tutorial post through any groups or claim as your own.


Snag my Blinkie :)

My TOU
Please do not copy, rewrite or claim my tutorials as your own, this also means copy/pasting in other groups or sharing.
If you want to use my tutorials in your group, you may, but please just a text link. A thank you in my chat box would be appreciated.
If you have any other questions, feel free to email me, use my ping box, or leave a comment in the chat box.
Hope you enjoy my tutorials
Hugs
Sarah
Labels
- Tag Offers (3)
- Tutorials (21)


