


<sigh>
 22:47 |
 Posted by
SarendysDreamz

See you all on the other side lol

Shall We Play

This tutorial was written by me October '10.
It is ©SarendysDreamz
Any similarity to other tutorials is coincidental.
Do not copy this tutorial post through any groups or claim as your own.
Supplies Needed
Scrap Kit I Used Is called ‘Rac Addict’ by CrystalsCreations. You Can find The Kit Here
Tube of Choice - I Used The Awesome Work of Ismael Rac which can be purchased here
Template of Choice – I used ccssexpianage which can be downloaded here
Step 1 – Open template, delete the top 2 layers
Step 2 – Activate layer 8
Selections – Select All
Selections – Float
Selections – Defloat
Layers – New Layer
Step 3 – Open paper of Choice
Edit – Copy
Step 4 – Go Back To Template
Edit – Paste into Selection
Selections – Select None
Rename Layer to Rectangle
Delete Layer 8
Step 5 – Activate Layer 5
Selections – Select All
Selections – Float
Selections – Defloat
Step 6 – Open Paper of Choice
Edit – Copy
Activate Template
Step 7 - Edit – Paste As New Layer
Selections – Invert
Hit Delete on the Keyboard
Select – Select None
Rename Layer to Back Circle
Delete Layer 5
Step 8 – Activate Layer 3
Selections – Select All
Selections – Float
Selections – Defloat
Step 9 – Open Paper of Choice
Edit – Copy
Activate Template
Step 10 - Edit – Paste As New Layer
Selections – Invert
Hit Delete on the Keyboard
Select – Select None
Rename Layer to Big Circle
Delete Layer 3
Step 11 – Activate Layer 2
Selections – Select All
Selections – Float
Selections – Defloat
Step 12 – Open Paper of Choice
Edit – Copy
Activate Template
Step 13 - Edit – Paste into Selection
Select – Select None
Rename Layer to Small Circle
Delete Layer 2
Step 14 – Activate Layer Named ‘Raster 4’
Selections – Select All
Selections – Float
Selections – Defloat
Step 15 - Layers – New Raster Layer
Floodfill with Colour to Match ‘Small Circle’
Selections – Select None
Layers – Merge Down
Delete ‘Raster 4’
**Step 16 – Delete Layers 4, 6 and 7**
I Did Not Use these Layers, But You May Wish To
Step 17 - Open tube of Choice
Resize if Needed
Place into Position in the Big Circle, Allowing Some to Overlap if Needed
Step 18 – Activate the Big Circle Layer
Selections – Select All
Selections – Float
Selections – Defloat
Selections – Invert
Make Tube Layer Active
Hit Delete on Keyboard
Step 19 – Image – Rotate Right
Delete Wordart Layer If You Wish To Use Your Own Wording
Make Layer 1 Active
Activate Text Tool
Add Text of Choice using Font of Choice, I Also Used A Drop Shadow of 1, 1, 100, 1 in Black
Image – Rotate Left
Step 20 – Using Same Font Add Desired Text to The Small Circle
Add Drop Shadow of Choice
Step 21- Add Any Elements of Choice, Resizing and Adding Drop Shadows As Needed
Step 22 – Layers – Merge Visible
Step 23 – Image – Resize (as Needed)
Step 24 – Add Copyrights/Watermarks
 Labels:
Blue Wish
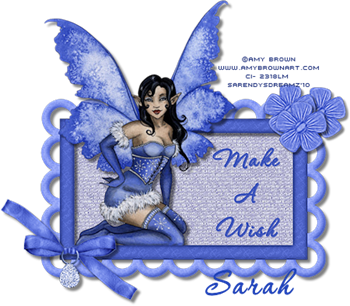
This tutorial was written by me September '10.
It is ©SarendysDreamz
Any similarity to other tutorials is coincidental.
Do not copy this tutorial post through any groups or claim as your own.
Supplies Needed
Scrap Kit I Used Is called ‘Little Rainbow Delite’ by Pspgirl. You Can find The Kit Here
Tube of Choice - I Used The Beautiful Work of Amy Brown which can be purchased here
Step 1 – Open New Image – 600x600px
Step 2 – Open Frame of Choice
Resize as Needed
Edit – Copy
Edit – Paste As new Layer onto Working Image
Step 3 – Activate your Magic Wand
Select Inside the Frame
Selections – Modify – Expand 5px
Step 4 – Open Paper of Choice
Edit – Copy
Edit – Paste As new Layer on Working Image
Selections – Invert – Delete
Selections – Select None
Step 5 – Open Tube Of Choice
Resize if Needed (allowing for Tube to ‘Pop’ Out of Frame)
Edit – Copy
Edit – Paste as New Layer onto Working Image
Move into Position
Step 6 – Activate Frame Layer
Layers – Duplicate
Move the Duplicated Layer Above Tube Layer
Step 7 – Using The Eraser, Carefully Delete Any of the Frame which is Covering The Top Part of the Tube
Step 8 – Add A Selection of Elements, Resizing as Needed
Step 9 – Add Drop Shadows to Bottom Frame Layer, Tube Layer and Element Layers, I Used 5, 5, 50, 5 and Black.
Step 10 – Layers – Merge Visible
Image – Resize to around 450px
Step 11 – Add Watermarks/Copyrights
Step 12 – Save as PNG

Lil Miss Gothic Girl

This tutorial was written by me August '10. It is ©SarendysDreamz
Any similarity to other tutorials is coincidental.
Do not copy this tutorial post through any groups or claim as your own.
Supplies Needed
Scrap Kit I Used Is called ‘Gothic Cutie’ by CrystalsCreations. You Can find The Kit Here
Template Of Choice - I Used ‘CMXC3T2 by JuicyBits Which Can Be Downloaded Here
Tube of Choice - I Used the Poser Which Came in the Scrap Kit
Step 1 – Open Template and Delete the ‘Credits’ Layer
Step 2 – Activate ‘Circle’ Layer
Selections – Select All
Selections – Float
Selections – Defloat
Step 3 – Open Paper of Choice, resize if Needed
Edit – Copy
Edit – Paste as New layer on Template
Selections – Invert
Hit Delete on Keyboard
Selections – Select None
Add A Drop Shadow
Step 4 – Activate ‘Paper1’ Layer
Selections – Select All
Selections – Float
Selections – Defloat
Step 5 – Open Paper of Choice, resize if Needed
Edit – Copy
Edit – Paste as New layer on Template
Selections – Invert
Hit Delete on Keyboard
Selections – Select None
Add A Drop Shadow
Step 6 – Activate the ‘Paper2’ Layer
Pick a Colour From your Working Image
Floodfill
Step 7 – Activate the ‘Paper3’ Layer
Pick a Second Colour From your Working Image
Floodfill
Step 8 – Activate ‘PhotoFrame’ Layer
Selections – Select All
Selections – Float
Selections – Defloat
Step 9 – Open Paper of Choice, resize if Needed
Edit – Copy
Edit – Paste Into Selection on Template
Selections – Select None
Step 10 – Activate the ‘Photoback’ Layer
Selections – Select All
Selections – Float
Selections - Defloat
Selections – Modify – Expand x5
Step 11 – Open Paper of Choice, resize if Needed
Edit – Copy
Edit – Paste Into Selection on Template
Selections – Select None
Step 12 – Activate ‘Paper1 Goth Stars’ Layer
Selections – Select All
Selections – Float
Selections – Defloat
Layers – New Raster Layer
Floodfill With Colour of Choice
Selections – Select None
Step 13 – Activate ‘Paper2 Circles’ Layer
Selections – Select All
Selections – Float
Selections – Defloat
Layers – New Raster Layer
Floodfill With Colour of Choice
Selections – Select None
Step 14 – Activate ‘Splatter4’ layer
Selections – Select All
Selections – Float
Selections – Defloat
Layers – New Raster Layer
Floodfill With Colour of Choice
Selections – Select None
Step 15 – Repeat Step 14 for Splatter1, Spatter2 and Splatter3 Layers
Step 16 – Delete Bottom Layer and Any Other Layers You Do Not Wish To Use.
Step 17 – Open Tube of Choice
Edit – Copy
Edit – Paste as New layer onto Working Image
Resize As Needed to Fit into The Frame
Move Below Frame Layer
Add Drop Shadow
Step 18 – Edit – Paste as New layer
(It Should Paste Your Tube Again)
Image – Mirror
Move To The Left
Step 19 – Add Any Other Elements
Resize as needed
Add Drop Shadows
Step 20 – Layers - Merge – Merge Visible
Image – Resize to around 450px
Add Copyrights/Watermarks
Step 21 – Save as png

Wicked Tutorial

This tutorial was written by me July '10. It is ©SarendysDreamz
Any similarity to other tutorials is coincidental.
Do not copy this tutorial post through any groups or claim as your own.
Supplies Needed
Scrap Kit I Used Is called ‘Poisoned Rain’ by Wicked Princess Scraps. You Can find The Kit Here
Template Of Choice - I Used ‘MC-Template80 by Melissa Which Can Be Downloaded Here
4 Tubes of Choice - I Used the Awesome Work of Keith Garvey Which Can Be Purchased Here
Mask Of Choice
Step 1 – Open Template and Delete the Watermark Layer
Step 2 – Activate ‘Dark Circle’ Layer
Selections – Select All
Selections – Float
Selections – Defloat
Step 3 – Open Paper of Choice, resize if Needed
Edit – Copy
Edit – Paste as New layer on Template
Selections – Invert
Hit Delete on Keyboard
Selections – Select None
Add A Drop Shadow
Step 4 – Activate ‘Light Circle’ Layer
Selections – Select All
Selections – Float
Selections – Defloat
Step 5 – Open Paper of Choice, resize if Needed
Edit – Copy
Edit – Paste as New layer on Template
Selections – Invert
Hit Delete on Keyboard
Selections – Select None
Add A Drop Shadow
Step 6 – Activate the ‘Rectangle’ Layer
Image – Free Rotate
(Left, 90 Degrees)
Move To The Left Side
Step 7 – Repeat Step 6 For The Rectangle Frame,
Squares and Squares Frame Layers
Step 8 – Activate ‘Rectangle’ Layer
Selections – Select All
Selections – Float
Selections – Defloat
Step 9 – Open Paper of Choice, resize if Needed
Edit – Copy
Edit – Paste as New layer on Template
Selections – Invert
Hit Delete on Keyboard
Selections – Select None
Step 10 – Activate the ‘Rectangle Frame’ Layer
Pick a Colour From Your Image
Floodfill The Frame
Step 11 – Activate the ‘Square Frame’ Layer
Floodfill with the Same Colour
Step 12 – Activate the ‘Squares’ Layer
Selections – Select All
Selections – Float
Selections – Defloat
Step 13 – Open Paper of Choice, resize if Needed
Edit – Copy
Edit – Paste as New layer on Template
Selections – Invert
Hit Delete on Keyboard
Selections – Select None
Step 14 – Activate the Magic Wand
Select Inside The Top Frame
Selections – Modify – Expand x2
Step 15 – Edit – Copy/Paste One of The Tubes
Move It Into Position
Selections – Invert
Hit Delete
Move Tube Layer Below Frame Layer
Add A Drop Shadow
Step 16 – Activate the Magic Wand
Select Inside The Middle Frame
Selections – Modify – Expand x2
Step 17 – Edit – Copy/Paste A Different Tube
Move It Into Position
Selections – Invert
Hit Delete
Move Tube Layer Below Frame Layer
Add A Drop Shadow
Step 18 – Activate the Magic Wand
Select Inside The Bottom Frame
Selections – Modify – Expand x2
Step 19 – Edit – Copy/Paste a 3rd Tube
Move It Into Position
Selections – Invert
Hit Delete
Move Tube Layer Below Frame Layer
Add A Drop Shadow
Step 20 – Open Main Tube
Resize if Needed
Add Drop Shadow
Move to the Right
Step 21 – Open WordArt of Choice
Resize if needed
Move to Below the Tube
Add Drop Shadow
Step 22 – Open Mask of Choice and Minimize
Open Paper of Choice
Edit – Copy/Paste onto Template
Layers – Arrange – Move to Bottom
Step 23 - Layers – New Mask Layer
Select the Mask from the Drop Down Menu
Layers – Merge as Group
Layers – Merge Visible
Step 24 – Image – Resize to around 450px on Longest Side
Step 25 – Add Copyrights/Watermarks

Double Trouble Tutorial

This tutorial was written by me July '10. It is ©SarendysDreamz
Any similarity to other tutorials is coincidental.
Do not copy this tutorial post through any groups or claim as your own.
Supplies Needed
Scrap Kit I Used Is called ‘Poisoned Rain’ by Wicked Princess Scraps. You Can find The Kit Here
Template Of Choice - I Used 'Freebie Template #254' by Missy Which Can Be Downloaded Here
Tube of Choice - I Used the awesome work of Elias Chatzoudis Which Can Be Purchased Here

Step 1 – Open Template and Delete the Watermark Layer
Step 2 – Activate the Circle Layer
Selections – Select All
Selections – Float
Selections - Defloat
Step 3 – Open Paper of Choice
Resize 60%
Edit – Copy
Step 4 – Make the Template Your Active Image
Edit – Paste As New Layer
Selections – Invert
Hit Delete On Your Keyboard
Selections – Select None
Delete the Original Circle Layer
Step 5 – Activate the Frame Background Layer
Selections – Select All
Selections – Float
Selections - Defloat
Step 6 – Open Paper of Choice
Resize 60%
Edit – Copy
Step 7 – Make the Template Your Active Image
Edit – Paste As New Layer
Selections – Invert
hit Delete On Your Keyboard
Selections – Select None
Delete the Original Frame Background Layer
Step 8 – Activate the Frame Background2 Layer
Selections – Select All
Selections – Float
Selections - Defloat
Step 9 – Open Paper of Choice
Resize 60%
Edit – Copy
Step 10 – Make the Template Your Active Image
Edit – Paste As New Layer
Selections – Invert
hit Delete On Your Keyboard
Selections – Select None
Delete the Original Frame Background2 Layer
Step 11 – Select a colour From The Frame Background Layer
Activate Arrow One Layer
Selections – Select All
Floodfill the Selected Arrows
Selections – Select None
Step 12 – Select a colour From The Frame2 Background Layer
Activate Arrow Two Layer
Selections – Select All
Floodfill the Selected Arrows
Selections – Select None
Step 13 – Copy and Paste Tube onto Template
Resize if Needed
Move into Position
Layers – Duplicate
Image – Mirror
Move Duplicated Tube into Position
Step 14 – add Drop Shadows if You Wish to
I Used 5, 5, 50, 5 and Black
Step 15 – Add any Elements Resizing if Needed
Step 16 – Delete Background Layer
Layers – Merge – Merge Visible
Step 17 – Image – Resize
I Resize to Around 450px On The Longest Side
Step 18 – Add Copyrights/Watermarks
ECbabe Tutorial
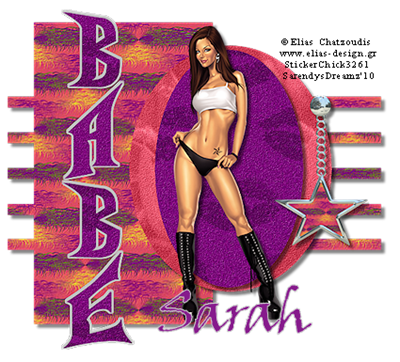
This tutorial was written by me May '10. It is ©SarendysDreamz
Any similarity to other tutorials is coincidental.
Do not copy this tutorial post through any groups or claim as your own.
Supplies Needed
Scrap Kit I Used Is called 'ColoriDiPrimavera_TS' by Pspgirl. You Can find The Kit Here
Template Of Choice - I Used 'Freebie Template #2' by BitsNBobs Which Can Be Downloaded Here
Tube of Choice - I Used the awesome work of Elias Chatzoudis Which Can Be Purchased Here
Step 1 - Open Template of Choice
Delete the Watermark Layer
Select 'Main' Layer
Step 2 - Selections - Select All
Selections - Float
Selections - Defloat
Step 3 - Open Paper of Choice
Edit - Copy
Step 4 - Go Back To Template
Edit Paste as New Layer
Selections - Invert
Hit Delete on Your Keyboard
Selections - Select None
Step 5 - Select the Bottom Oval Layer
Step 6 - Repeat Steps 2 - 4
Step 7 - Select Top Oval Layer
Step 8 - Repeat Steps 2 - 4
Step 9 - Select the 'Babe' Layer
Step 10 - Repeat Steps 2 - 4
Step 11 - Add Elements of Choice
Resize as Needed
Step 12 - Add Drop Shadows To All Layers
I Used
Step 13 - Open Tube of Choice
Resize if Needed
Place Slightly to the Right
(see my tags for placement)
Add Drop Shadow
Step 14 - Delete Background Layer
Step 15 - Layers - Merge Visible
Image - Resize
(Approx 450px on longest side)
Step 16 - Add Copyrights/Watermark
Step 17 - Save as PNG


Who Me Tutorial

This tutorial was written by me May '10. It is ©SarendysDreamz
Any similarity to other tutorials is coincidental.
Do not copy this tutorial post through any groups or claim as your own.
Supplies Needed
Scrap Kit I Used Is called 'ColoriDiPrimavera_TS' by Pspgirl. You Can find The Kit Here
Tube of Choice - I Used One of the Posers From the Kit
Step 1 - Open a Transparent Image 500x500px
Step 2 - Open Frame of Choice
Resize as Needed
Activate Magic Wand
(feather and tolerance - 0)
Step 3 - Click Inside the Frame
Selections - Modify - Expand 2px
Layers - New Layer
Step 4 - Open Paper of Choice
Edit - Copy
Step 5 - Go Back to Image
Edit - Paste into Selection
Selections - Select None
Layers - Arrange - Move Down
Step 6 - Open Pspgirl_ColoriDiPrimavera_element10 or a Similar Element.
Copy and Paste onto Working Image
Resize as Needed
Step 7 - Place in the Frame (see mine for example)
Layers - Duplicate
Image - Mirror
Layers - Merge Down
Step 8 - Add Drop Shadows to Frame Layer and your Element Layer
Step 9 - Open Poser or Tube Of Choice
Resize As Needed
Edit - Copy
Edit - Paste Onto Working Image
Move to the Right
Step 10 - Add Any Other Elements
Resizing as Needed
Add Drop Shadows
Step 11 - Open Paper of Choice
Edit - Copy
Edit - Paste onto Working Image
Layers - Arrange - Send to Bottom
Step 12 - Effects - Reflection Effects - Kaleidoscope
Play with the Settings until You Find Something You Like
I Used 83, 24, 233, –69, 5, 0, 88 and Wrap
Step 13 - Layers - Merge All
Image - Add Borders
1px in Dark Colour
8px in White
1px in Dark Colour
Step 14 - Activate Magic Wand
Select White Border
Effects - Reflection Effects - Kaleidoscope
Use Same Settings As Before
Step 15 - Effects - 3d Effects - Inner Bevel
Step 16 - Resize to Around 425px
Step 17 – Add Copyrights/Watermarks


BJ Happy Valentines
This tutorial was written by me January '10. It is ©SarendysDreamz
Any similarity to other tutorials is coincidental.
Do not copy this tutorial post through any groups or claim as your own.
Supplies Needed
Scrap Kit I Used Is called 'Surprise' by Cadi's Fun Scraps. You Can Download The Kit Here
Template Of Choice - I Used 'Freebie Template 25' Which Can Be Downloaded Here
Tube of Choice - I Used the awesome work of Barbara Jensen Which Can Be Purchased Here
Step 1 - Open Template of Choice
Delete the watermark layers
Step 2 - Open Tube of Choice
Select 2 Colours
Step 3 - Activate the Middle Rectangle Layer
Selections - Select All
Selections - Float
Step 4 - Layers - New Layer
Flood Fill with One of the Two Colours
Selections - Select None
Effects - 3d Effects - Drop Shadow
Step 5 - Repeat step 3 and 4 For The Other Two Rectangles
Step 6 - Activate Circle 1 Layer
Selections - Select All
Selections – Float
Selections - Defloat
Step 7 - Open Paper 8
Copy - Paste onto Template
Selections - Invert
Delete
Selections-Select None
Add Drop Shadow
Step 8 - Activate Circle 2 Layer
Selections - Select All
Selections - Float
Step 9 - Open Paper 5
Copy - Paste onto Template
Selections - Invert
Delete
Selections-Select None
Step 10 - Activate Circle 3 Layer
Selections - Select All
Selections - Float
Layers - new Layer
Flood Fill with same Colour as Before
Selections-Select None
Step 11 - Activate Stars 1 Layer
Selections - Select all
Selections - Float
Layers - New Layer
Flood Fill with same Colour as Before
Selections-Select None
Step 12 - Activate Stars 2 Layer
Selections - Select all
Selections - Float
Layers - New Layer
Flood Fill with Your Second Colour
Selections-Select None
Step 13 - Activate Stars 3 Layer
Selections - Select all
Selections - Float
Layers - New Layer
Flood Fill with Your Second Colour
Selections-Select None
Step 14 - Open CFS_Surprise-Pendant
Image - Resize 50%
Copy - Paste onto Template
Move to the Left Rectangle
Add Drop Shadow
Step 15 - Layers - Duplicate
Image - Mirror
Step 16 - Copy - Paste Tube onto Template
Resize if Needed
Move into Position
Add Drop Shadow
**At this Point I Delete all Template Layers so I Just Have My Layers**
Step 17 - Close Off The White Background
Layers - Merge Visible
Open White Background
Step 18 - With the Merged Layer Active
Image - Resize (all Layers NOT Active) 75%
Step 19 - Open CFS_Surprise-Flowerbranch
Image - Resize 50%
Copy - Paste onto Template
Image - Mirror
Move into Position
Step 20 - Layers - Duplicate
Image - Mirror
Image - Flip
Layers - Merge Down
Layers - Arrange - Move Down
Layers - Merge Down
Step 21 - Activate Crop Tool
Click On Layer Opaque
Step 22 - Image - Resize to Around 450px On The Longest Side
Adjust - Sharpen
Step 23 - Add Copyrights/Watermarks


Merry Polar
This tutorial was written by me December '09. It is ©SarendysDreamz
Any similarity to other tutorials is coincidental.
Do not copy this tutorial post through any groups or claim as your own.Scrap Kit of Choice - I Used Jules-CC-Mini-Kit1 by Jules Junk Which Can Be Downloaded here
Tube of choice - I Used the Polar Bear from the Mini-Kit
Step 1 - Open Frame of Choice, I Used Jules-CC-K1-Frame2
Step 2 - Activate your Magic Wand
(Tolerance and Feather - 0)
Step 3 - Select the Middle of the Frame
Selections - Modify - Expand 5 px
Step 4 - Open Paper of Choice
I Used Jules-CC-K1-Paper1
Image - Resize 500px x 500px
Step 5 - Edit - Copy
Activate the Frame Image
Edit - Paste as New Layer
Selections - Invert
Press Delete on your Keyboard
Selections - Select None
Layers - Arrange - Move Down
Step 6 - Open Element of Choice
I Used Jules-CC-K1-Curl
Image - Resize 50% and Then 60%
Edit - Copy
Activate Frame Layer
Edit - Paste as New Layer
Move to the Top Right Corner
Layers - Duplicate
Image - Mirror
Step 7 - Open Tube of Choice
I Used Jules-CC-K1-Polar from Jules Junk Mini-Kit
Image - resize 75%
Edit - Copy
Activate Frame Layer
Edit - Paste as New Layer
Step 8 - Move the Tube to the Bottom Right
(see my tag for placements)
Step 9 - Image - Add Borders
1px in a dark colour
Image - Add Borders
20 px in White
Step 10 - Activating the Magic Wand
Select the White Border
Effects - Reflection Effects - Kaleidoscope
Step 11 - Effects - 3d Effects - Inner Bevel
Selections - Select None
Step 12 - Add Any Other Elements
Resizing as Needed
Step 13 - Activate the Text
Write 'Merry Christmas' Above the Tube Used
Step 14 - Layers - Merge - Merge Visible
Image - Resize to around 400px
Step 15 - Add Watermarks/Copyrights


Tag Group :)

If you like collecting tags or wanna join a group to offer out your tags click the tag above to join my group :)
Rainbow Dreamz
This tutorial was written by me September '09. It is ©SarendysDreamz
Any similarity to other tutorials is coincidental.
Do not copy this tutorial post through any groups or claim as your own.Scrap Kit of Choice - I Used Rainbow by Itha & Patrick Which Can Be Downloaded here
Tube of choice - I Used the Awesome Work of Celesse which can be purchased here
Template of Choice - I Used CMXC3T3 by JuicyBits which can be Downloaded here
Step 1 - Open Template CMXC3T3
Delete the Watermark Layer and the Blue Background
Step 2 - Select layer Rect3
Selections - Select All
Selections - Float
Layers - New Layer
Step 3 - Open Paper of Choice (I Used rb_iup-Paper030)
Edit - Copy
Go Back to template
Edit - Paste into Selection
Selections - Select None
Add Drop Shadow of Choice
Step 4 - Select layer Rect2
Selections - Select All
Selections - Float
Layers - New Layer
Step 5 - Open Paper of Choice (I Used rb_iup-Paper023)
Edit - Copy
Go Back to template
Edit - Paste into Selection
Selections - Select None
Add Drop Shadow of Choice
Step 6 - Select layer Rect1
Selections - Select All
Selections - Float
Layers - New Layer
Step 7 - Open Paper of Choice (I Used rb_iup-Paper018)
Edit - Copy
Go Back to template
Edit - Paste into Selection
Selections - Select None
Add Drop Shadow of Choice
Step 8 - Select layer Circleback
Selections - Select All
Selections - Float
Layers - New Layer
Step 9 - Open Paper of Choice (I Used rb_iup-Paper025)
Edit - Copy
Go Back to template
Edit - Paste into Selection
Selections - Select None
Add Drop Shadow of Choice
Step 10 - Select layer WaveLength
Selections - Select All
Selections - Float
Layers - New Layer
Step 11 - Open Paper of Choice (I Used rb_iup-Paper026)
Edit - Copy
Go Back to template
Edit - Paste into Selection
Selections - Select None
Add Drop Shadow of Choice
Step 12 - Select ClosedHoles
Selections - Select All
Selections - Float
Layers - New Layer
Step 13 - Open Paper of Choice (I Used rb_iup-Paper028)
Edit - Copy
Go Back to template
Edit - Paste into Selection
Selections - Select None
Add Drop Shadow of Choice
Step 14 - Close off ALL Layers above OpenCircle
Activate Magic Wand
(Tolerance and Feather - 0)
Step 15 - Whilst Holding Down the Shift Button, Select inside Each Circle.
Selections - Expand 3px
Layers - New layer
Select 2 Colours From Your Tube
Floodfill the Circles, Alternating the Colours
Selections - Select None
Step 16 – Open ALL Layers and make the Top Layer Ac tive
Step 17 - Paste Tube of Choice as New Layer
Resize if Needed and move to the Left
Step 18 - Add Any Elements
Add Drop Shadow of Choice
Step 19 - Layers - New Layer
Floodfill White
Layers - Arrange - Move to Bottom
Step 20 - Image - Crop
Image - Resize to around 400 on the longest side
Step 21 - Add watermarks/copyright

Emotions Tutorial
This tutorial was written by me September '09. It is ©SarendysDreamz
Any similarity to other tutorials is coincidental.
Do not copy this tutorial post through any groups or claim as your own.Supplies Needed
Scrap Kit of Choice - I Used Mixed Emotions by Cadi's Fun Scraps Which Can Be Purchased here
4 tubes of choice - I Used the Awesome Work of Jennifer Janesko which can be purchased here
Template of Choice - I Used MisfitsTemplate3 by SugarBritches which can be Downloaded here
Mask of Choice - I Used SpadedMask_ByVon1 Which Can Be Downloaded here
Step 1 - Open Template and Delete the Watermark Layer
Layers - New Raster Layer
Floodfill White
Layers - Arrange - Send to Bottom
Step 2 - Activate Raster 11 (The Long Purple Strip)
Selections - Select All
Selections - Float
Selections - Modify - Expand 1px
Step 3 - Open Paper of Choice (I Used CFS_MixedEmotions-Paper17)
Edit - Copy
Step 4 - Go Back to the Template
Edit - Paste as New Layer
Selections - Invert
Hit Delete on your Keyboard
Selections - Select None
Step 5 - Add Drop Shadow
3, 3, 55, 5
Step 6 - Select Raster 1 (the Circle)
Selections - Select All
Selections - Float
Selections - Modify - Expand 1px
Layers - new Layer
Step 7 - Open Paper of Choice (I Used CFS_MixedEmotions-Paper7)
Edit - Copy
Edit - Paste into Selection
Selections - Select None
Add Same Drop Shadow As Before
Step 8 - Select Raster 5
Selections - Select All
Selections - Float
Selections - Modify - Contract 4px
Step 9 - Layers - New Layer
(Using Same Paper as Before)
Edit - Paste into Selection
Step 10 - Open Tubes Of Choice
Resize as Needed
Edit - Copy
Step 11 - Edit - Paste As New Layer on Template
Move into Position Inside of Frame
Selections - Invert
Delete Tube Outside of Frame
Selections - Select None
Step 12 - Do Same for Other 2 Frames - Raster 7 and Raster Copy of Raster 5
Step 13 - Activate Raster 6 (White Frame)
Layers - Merge Down
Layers - Merge Down
So The White Frame, Tube and Frame Background are Merged
Step 14 - Repeat Step 12 for the other 2 Frames
Step 15 - Add Drop Shadow to all 3 frames
3, 3, 55, 5
Step 16 - Select the Big Star Layer
Using the Magic Wand
(Feather and Tolerance - 0)
Select inside the Star
Step 17 - Open Paper of Choice
Edit - Copy
Go Back to Template
Edit - Paste into Selection
Add Same Drop Shadow As before
Step 18 - Either Repeat Step 17 for the Smaller Stars
Or Delete the Layers
Step 19 - Add Your Main Tube
Resize if Needed
Step 20 - Add Any Extra Elements
Resizing if Needed
Add Drop Shadows
Step 21 - Activate Bottom Layer
Open Paper of Choice (I Used CFS_MixedEmotions-Paper3)
Edit - Copy
Edit - Paste as New Layer onto Template
Step 22 - Open Mask of Choice
Minimize Mask
Step 23 - Layers - New Mask Layer

Layers - Merge Group
Lower Opacity to 50%
Step 24 - Layers - Merge Visible
Image - Resize to around 400px on the Longest Side
Step 25 - Add Watermarks/Copyrights
Hope you have enjoyed this tutorial :)


Love is Tutorial
This tutorial was written by me August '09. It is ©SarendysDreamz
Any similarity to other tutorials is coincidental.
Do not copy this tutorial post through any groups or claim as your own.Supplies Needed
Template of Choice - I used 'Missy_Tag_Template165' Which Can Be Downloaded here
Tube of Choice - I Used the Awesome Work of Jennifer Janesko Which Can Be Purchased Here
Scrap Kit of Choice - I Used is Called 'Chocopink' by Meadowsong and Can Be Purchased here
Step 1 - Open Missy_Tag_Template165
Delete the Watermark Layer
Step 2 - Select The Square 3 Layer
Selections - Select all
Selections - Float
Selections - Modify - Expand 1px
Step 3 - Open Paper of Choice, I Used Chocopink_Paper6
Edit - Copy
Go Back to Template
Layers - New Raster Layer
Edit - Paste into Selection
Selections - Select None
Step 4 - Repeat Steps 2 and 3 For The Square 1 and Square 2 Layers
I Used Chocopink_Paper9 for Square 1 and Chocopink_Paper5 for Square 2
Step 5 - Activate Frame Layer
Select Your Magic Wand
(tolerance and feather at 0)
Select Inside The Frame
Selections - Modify - Expand 1px
Step 6 - Layers - New Raster Layer
Open Paper of Choice, I Used Chocopink_paper4
Go Back to Template
Edit - Paste into Selection
Selections - Select None
Move the Paper Layer Below the Frame Layer
Step 7 - Open Tube of Choice
Resize as Needed
Copy and Paste as New Layer onto Template
Add Drop Shadow
Step 8 - Open Chocopink_Bow2
Resize 50%
(all layers UNchecked)
Copy - Paste onto Template
Image - Free Rotate - Left 15 Degrees
Move to the Top Right of your Frame
Step 9 - Layers - Duplicate
Image - Mirror
Move the Duplicated Bow to the Bottom Left
Add Same Drop Shadow As Before
Step 10 - Open Wordart of Choice, I Used chocopink_word1
Resize 75%
Copy - Paste as New Layer onto Template
Image - Free Rotate - Left 20 Degrees
Step 11 - Close Off ALL Layers Above Dotted Square
Make The Dotted Square Layer Active
Activate Your Dropper Tool and Pick 2 Colours From Your Image
Step 12 - Selections - Select All
Selections - Float
Layers - New Raster Layer
View - Zoom In to Around 250%
Step 13 - Starting at the Top left, Floodfill the Little Squares alternating Between Your 2 Colours Until You Have Filled in ALL The White Boxes
ReName Layer Blinkie1
Step 14 - Layers - New Raster Layer
And Repeat Step Changing the Colour You Started With
ReName Layer Blinkie2
**If You Used 2 Light Colours, Delete The Dotted Square Layer, I Used A Dark Color So Kept Mine**
Step 15 - Selections - Select None
View - Zoom Out Until Your At 80%
Step 16 - Image - Resize to a suitable size
I Usually resize to 400px on the longest size
(All Layers CHECKED)
Step 17 - Adjust - Sharpness - Sharpen ALL Layers
Step 18 - Add Copyright/Watermark
Step 19 - Close Off Blinkie1
Edit - Copy Special - Copy Merged
Step 20 - Open Up Animation Shop
Edit - Paste As New Animation
Step 21 - Go Back To PSP
Open Blinkie1 and Close off Blinkie2
Edit - Copy Special - Copy Merged
Step 22 - Go Back To Animation Shop
Edit - Paste- After Current Frame
Step 23 - Go To View - Animation
To make Sure the Animation Looks Ok
Step 24 - File - Save As - Name Your Tag :)
Hope you have enjoyed this tutorial


I've Been Tagged LMAO
THREE NAMES I GO BY:Sarah, Sassy, Sarendysdreamz
*****
THREE PLACES I HAVE LIVED: Essex, UK, Bognor Regis UK, oh and Essex.UK lol
*****
THREE THINGS I LIKE TO WATCH:True Blood, Bones, Stargate SG1
*****
THREE PLACES I HAVE BEEN: Most of Europe, TN USA, Canada
*****
THREE OF MY FAVOURITE FOODS: Italian, Chinese, Mexican
*****
THREE THINGS I AM LOOKING FORWARD TO: My Vacation, Sleep,
*****
THREE OF YOUR FAVORITE PEOPLE: Wendy, Jules and Shelly :)
*****
THREE FAVORITE COLOURS: Purple, Pink, Blue
*****
THREE FAVORITE BOOKS: Any Books By Christine Feehan, LJ Smith and Sophie Kinsella
****
THREE THINGS YOUR GOING TO DO TODAY: PSP, Sleep and play in Facebook
*****
PASS THIS ON TO 5 BLOGS TO FIND OUTTHREE THINGS ABOUT YOUR FRIENDS(if you've already been tagged, dont worry about it, cause I'm not) lol
Jules
Anne
Crazed
Steph
June
I Miss You
This tutorial was written by me August '09. It is ©SarendysDreamz
Any similarity to other tutorials is coincidental.
Do not copy this tutorial post through any groups or claim as your own.Supplies Needed
Template of Choice - I used 'Missy_Tag_Template30' Which Can Be Downloaded here
Tube of Choice - I Used the Gorjuss Work of Suzanne Woolcott Which Can Be Purchased here
Scrap Kit of Choice - The Kit I Used is Called 'I Miss You' by Bea Creations and Can Be Purchased here
Step 1 - Open Missy_Tag_Template30
Select 'Frame Background' Layer
Activate your Magic Wand and Select the Background
Selections - Modify - Expand 1px
Step 2 - Open Paper of Choice, I used p1_BC_imy
Image - Resize - 75%
Edit - Copy
Step 3 - Make the Template Active
Edit - Paste as New Layer
Selections - Invert
Hit Delete on Your Keyboard
Selections - Select None
Step 4 - Make the 'Frame' layer Active
Activate your Magic Wand and Select Inside the Frame
Selections - Modify - Expand 1px
Layers – New Raster Layer
Step 5 - Open Paper of Choice, I used p4_BC_imy
Edit - Copy
Step 6 - Make the Template Active
Edit - Paste into Selection
Selections - Select None
Step 7 - Make the 'Lines 2' Layer Active
Layers - Merge Down
Selections - Select All
Selections - Float
Step 8 - Layers - New raster Layer
Edit - Paste into Selection
**I Used the Same Paper as the Frame**
Selections - Select None
**I Closed off 'Line 1' Layer**
Step 9 - Open Tube of Choice
Resize if Needed
Edit - Copy
Edit - Paste as new Layer
Move Tube Layer Below the Frame Layer
Effects - Drop Shadow
Step 10 - Select the 'Brush' Layer
Selections - Select All
Selections – Float
Layers – New Raster Layer
Step 11 - Open Paper of Choice, I used p20_bc_imy
Edit - Copy
Activate Template
Edit - Paste into Selection
Selections - Select None
**I Closed off the Brush Layer**
Add Drop Shadow
Step 12 - Open Envelope2_BC_imy
Image - Resize 50% Twice
Edit - Copy
Edit - Paste as New Layer onto Template
Move to the Bottom left
Image - Free Rotate
Left - 20 Degrees
Add Drop Shadow
5, 5, 50, 10
Step 13 - Open Candle_BC_imy
Image - Resize 50% Twice
Edit - Copy
Edit - Paste as New Layer onto Template
Move to the Bottom left
Add Drop Shadow
5, 5, 50, 10
Step 14 - Open Butterfly2_BC_imy
Image - Resize 50% Twice
Edit - Copy
Edit - Paste as New Layer onto Template
Move to the Top left
Add Drop Shadow
5, 5, 50, 10
Step 15 - Layers - Merge Visible
(Delete the Closed Layers)
Step 16 - Add Copyrights/Watermarks
Step 17 - Save as JPG


Rock Your Soul
This tutorial was written by me August '09. It is ©SarendysDreamz
Any similarity to other tutorials is coincidental.
Do not copy this tutorial post through any groups or claim as your own.Supplies Needed
Tube of Choice - I Used the Awesome Work of Popeye Wong, he is FTU and you can find his tubes here
Scrap Kit of Choice - I Used is Called 'RockStar' by MellieBeans which can be purchased here
Template of Choice - I used 'Missy_Tag_Template26' Which Can Be Downloaded here
The WordArt I Used Can Be Downloaded here
Step 1 - Open Template
Click on the Circle Layer
Activate Magic Wand
(tolerance/feather - 0)
Selections - Modify - Expand - 1px
Step 2 - Open Paper of Choice, I used 'MH_Rockstar-p04
Edit - Copy
Go Back to the Template
Layers - New Raster Layer
Edit - Paste into Selection
Selection - Select None
Step 3 - Click On the Small Stars Layer
Activate Magic Wand
(tolerance/feather - 0)
Selections - Modify - Expand - 1px
Step 4 - Open Paper of Choice, I used 'MH_Rockstar-p06
Edit - Copy
Go Back to the Template
Layers - New Raster Layer
Edit - Paste into Selection
Selection - Select None
Step 5 - Click on The Big Star Layer
Activate Magic Wand
(tolerance/feather - 0)
Selections - Modify - Expand - 1px
Step 6 - Open Paper of Choice, I used 'MH_Rockstar-p07
Edit - Copy
Go Back to the Template
Layers - New Raster Layer
Edit - Paste into Selection
Selection - Select None
Step 7 - Click on the Dotted Star Outline
Activate Magic Wand
(tolerance/feather - 0)
Selections - Modify - Expand - 1px
Step 8 - Open Paper of Choice, I used 'MH_Rockstar-p06
Edit - Copy
Go Back to the Template
Layers - New Raster Layer
Edit - Paste into Selection
Selection - Select None
Step 9 - Open Tube of Choice
Resize If Needed
Edit - Copy
Step 10 - Active Template Image
Edit - Paste as New layer
Move the Tube to the Left
Step 11 - Add Drop Shadow to Tube
Step 12 - Open MH_Rockstar-BeadDoodle03
Or doodle of choice
Edit - Copy
Step 13 - Edit - Paste as new Layer
Move the Doodle Layer Down so
It is Above the White Background Layer
Step 14 - Open Up WordArt
Image - Resize 60%
Edit - Copy
Edit - Paste as new Layer onto Template
Step 15 - Add Any Other Elements
Resize as Needed
Add Same Drop Shadow As Before
Step 16 - Add Copyrights/Watermarks
Step 17 - Save as Jpg


Huggies Tutorial

This tutorial was written by me July '09. It is ©SarendysDreamz
Any similarity to other tutorials is coincidental.
Do not copy this tutorial post through any groups or claim as your own.
Supplies NeededTube of Choice - I Used the Bear who is Provided in the Scrap Kit
Scrap Kit of Choice - I Used JulesJunk Section of the 'Friends and Family Collab' Kit Which can be Purchased here
Mask of Choice - I Used the Awesome Freebie Masks By JulesJunk Which Can Be Downloaded here. I Used Julesmsk16
Font of Choice
Step 1 - Open Transparent Image 500x500
Selections - Select All
Step 2 - Open Paper of Choice, I Used Jules_fnf_Collab_paper2
Edit - Copy
Step 3 - Make your Transparent Image Active
Edit - Paste into Selection
Selections - Select None
Step 4 - Open frame of Choice, I Used Jules_fnf_Collab_Frame6
Resize as needed, I Resized 75%
(resize all layers UNchecked)
Edit - Copy
Edit - Paste as New Layer onto Working Image
Step 5 - Activate Your Magic Wand
(tolerance and feather - 0)
Select Inside The Frame
Selections - Modify - Expand 2px
Layers - New Raster Layer
Step 6 - Open Paper of Choice, I Used Jules_fnf_Collab_Paper10
Edit - Copy
Go Back To Your Working Image
Edit - Paste Into Selection
Selections - Select None
Move the Paper Layer Below The Frame Layer
Step 7 - Open Tube Of Choice, I Used Jules_fnf_Collab_Bear
Resize as needed, I Resized the bear 50% then 90%
Edit - Copy
Step 8 - Edit Paste As New Layer onto Working Image
Place the Tube in the Frame
Add Drop Shadow
Step 9 - Open Flower of Choice, I Used Jules_fnf_Collab_Charm
Image - Resize as Needed
Move to the Bottom Left of the Frame
Add Same Drop Shadow as Before
Step 10 - Open Ribbon Of Choice, I Used Jules_fnf_Collab_Bow3
Resized If Needed
Move to Top Right of Frame
Add Drop Shadow
Step 11 - Add Any Other Elements You Want to Add
Remembering to Resize and add Drop Shadows
Step 12 - Open Doodle Of Choice, I Used Jules-FnF_Collab_Doodle
Resize As Needed, I Resized 50% Twice
Move to Top Right Corner
Move Doodle Layer so its Below the First Paper Layer
Layers - Duplicate
Image - Mirror
Layers - Duplicate
Image - Flip
Layers - Duplicate
Image - Mirror
Step 13 - Add Drop Shadow To Each Doodle
3, 3, 50, 3
Step 14 - Close Off The Paper Layer
Layers - Merge Visible
Open Paper Layer Again
Step 15 - Open Mask and Minimize
Make Sure Your Working Image is Active
Layers - New mask Layer - From Image
Step 16 - Layers - merge group
Layers - Merge Visible
Step 17 - Image - Resize
(all Layers CHECKED)
I Resized Mine to 400x400
Step 18 - Adjust - Sharpness - Sharpen
Add watermark/copyrights
Step 19 - Save as PNG
Hope ya enjoyed this tut :)


Tag Offer - Everytime

This is one of my tags currently up for requests, to request it please click the tag and it will take you to my ERL site :)
Plaid Tutorial

This tutorial was written by me July '09. It is ©SarendysDreamz
Any similarity to other tutorials is coincidental.
Do not copy this tutorial post through any groups or claim as your own.
Supplies NeededTube of Choice - I Used the Awesome Work of Keith Garvey Which Can Be Purchased Here
Scrap Kit I Used is Called 'Reverie' by MellieBeans which can be purchased here
Font of Choice
Step 1 - Open Transparent Image 700x700
Step 2 - Open MH_Reverie_Frame4 or Frame of Choice
Copy - Paste as New Layer onto Transparent Image
Step 3 - Open MH_Reverie_Frame5 or a Different Frame of Choice
Copy - Paste as New Layer onto Transparent Image
Image - Free Rotate
left 45 degrees
Layers - Merge Down
Step 4 - Make Raster 1 Active
Open Paper of Choice, I Used MH_Reverie_PP01
Edit - Copy
Step 5 - Make Your working Image Active
Selections - Select All
Edit - Paste Into Selection
Selections - Select None
Step 6 - Make the Frame Layer Active
Activate your Magic Wand
(Feather and Tolerance = 0)
Step 7 - Select The Outside of the Frame
Make Your Paper Layer Active
Hit Delete On Your Keyboard
Selections - Select None
Step 8 - Open MH_Reverie_ScatteredGlitter01, Or Glitter/Doodle of Choice
Image - Resize 85%
Copy - Paste as new Layer
Layers - Duplicate
Image - Mirror
Step 9 - Open Tube Of Choice, Resize If Needed
Copy - Paste as New Layer
Place Tube In Frame
(See Mine For Example)
Step 10 - Add Drop Shadow
4, 4, 50, 10
Step 11 - Activate Frame Layer
Layers - Duplicate
Move the Duplicated Frame Above The Tube Layer
Step 12 - Active Your Eraser Tool
Carefully Erase The Frame So The Top Of The Tube Looks Like She’s Outside the Frame.
Step 13 - Add a Drop Shadow to the Bottom Frame
(I Used Same DS As Before)
Step 14 - Open Bow of Choice, I Used MH_Reverie-Bow02
Image - Resize 50% then 75%
Copy - Paste as New Layer onto Working Image
Image - Free Rotate
(Same As Before)
Move to The Top Left Of the Frame
Step 15 - Open Flower of Choice
Image - Resize 50% and then 50%
Copy - Paste as New layer onto Working Image
Step 16 - Move to The Bottom Left
Add Drop Shadow
(I used Same as Before)
Image - Duplicate
Move the Duplicated Flower Down Slightly
Step 17 - Layers - Merge Visible
Step 18 - Open MH_Reverie_Splatter01, Or Doodle of Choice
Copy - Paste as New Layer onto Working Image
Move to the Bottom Left
Layers - Duplicate
Image - Flip
Image Mirror
Layers - Merge Down
Step 19 - Open MH_Reverie_Splatter02, Or Doodle of Choice
Copy - Paste as New Layer onto Working Image
Move to Top Left
Layers - Duplicate
Image - Mirror
Image - Flip
Layers - Merge Down
Step 20 - Layers - Merge Down
Layers - Arrange - Send to Bottom
Layers - Merge Visible
Step 21 - Image - Resize
Adjust - Sharpness - Sharpen
Step 22 - Add Copyrights and Watermarks
Save as JPG


Snag my Blinkie :)

Copyright


